Introduction
Ah, the allure of planting fall bulbs in containers! If you’ve ever marveled at a neighbor’s radiant display of spring-blooming bulbs in pots and wished for that secret recipe, you’re not alone. Diving into the art of how best to plant these spring bloomers in containers is a journey of both creativity and technique. It’s about more than just digging and placing; it’s about sculpting nature’s canvas with flair. Here, we will delve deep into how to plant bulbs in containers to cultivate a blooming paradise, be it on your balcony, patio or backyard. Ready to transform your prowess for planting bulbs in pots? Let’s unravel this blooming mystery together.
Choosing the Right Spring-Blooming Bulbs
Selecting the perfect spring-blooming bulbs for your containers is akin to crafting a masterpiece with nature’s own palette. The first brushstroke in your garden tableau begins with a choice of bulbs tailored to your aesthetic and your area’s climate.
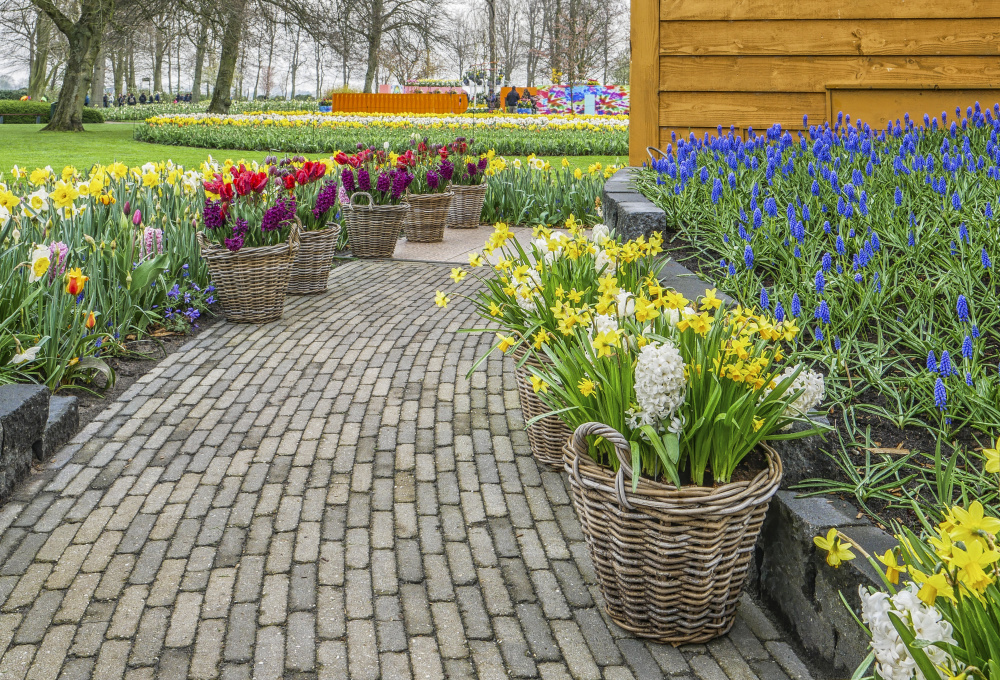
Types of Bulbs: To infuse an effervescent splash of color come spring, consider using crocus, tulips, daffodils, hyacinths and muscari (aka grape hyacinths). Whether you envision a monochrome tapestry or a kaleidoscope of hues, the correct bulbs will deliver a season of unrestrained bloom and vitality.

Complementary Blooming Times: Crafting a continuous tableau of blooming wonder through the season necessitates selecting bulbs that harmonize in their bloom times. The strategy here is to orchestrate a mix of early, mid- and late-season bloomers to guarantee a ceaseless visual treat sprouting through the potting soil.
Color and Size: Sculpting visual harmony among your spring bulbs involves not just color but also size. Infuse depth and balance in your container by experimenting with the dimensions of tall and short bulbs. This will lead to a visual that’s all your own and pleases on many levels.

Understanding the Impact of Location on Bulb Success
Geographical locations, delineated by the U.S. Department of Agriculture into various hardiness zones, play a pivotal role in determining the growth rhythm of your bulbs. Each USDA zone, with its unique climatic features, dictates what’s needed for success when overwintering bulbs. Understanding the nuances of your region helps in nurturing bulbs that are adapted to the specific needs of your hardiness zone.
How to Prepare Your Spring-Blooming Bulbs (Chilling Requirements)
When embarking on the chilling process of planting fall bulbs in containers, we are guiding the bulbs through a preparatory phase to initiate them into a growth cycle that promises robust blooms in springtime.
Chilling mimics the bulb’s natural habitat—a simulated cold winter—to condition them for their triumphant awakening from dormancy. This phase orchestrates a series of physiological transformations, setting the stage for a vibrant flowering period.
Your spring bloomers in bulb form present a variety of chilling needs, so a meticulous gardener must dive deep and research the unique requirements of the chosen bulbs. This includes defining a chilling period during dormancy that ranges from a few weeks to a few months.
Essential to this process is a consistent temperature of about 40°F. Ventilated and dry environments, such as a refrigerator or cool basement, serve as the ideal haven for steering clear of mold and rot, which are the adversaries of chilling.
| Flower Type | # Weeks of Cold |
| Crocus | 15 |
| Tulips | 14-20 |
| Daffodils | 15-17 |
| Hyacinths | 10-12 |
| Muscari | 13-15 |
How to Plant Bulbs in Containers
As we continue along this path, keep in mind that the container itself is where the art of container gardening unfolds. Putting together a home for your bulbs involves choosing a pot that resonates with the needs of your plants, ensuring a depth of 8-12″ and fostering a nurturing space for growth.
Flowerpots have long been made primarily from clay-based earthenware called terracotta. More recently, containers have been manufactured from plastic, metal, wood, concrete, stone or biodegradable materials. These can include peat, bamboo, recycled paper or even composted cow manure. Waterlogged bulbs can lead to root rot. To avoid this, be sure your pots have proper drainage holes.
If you’ve got your pots picked out, then it’s time to get planting. Aim to set the bulbs at a depth that is approximately three times their height. Keep in mind that they like their personal space, so allow sufficient distance between bulbs to accommodate growth. Refer to the guidelines for your specific bulb varieties to figure out how much room they’ll need to avoid being too crowded.
How to Care for Bulbs Planted in Containers
To foster success in your container garden, a harmonious synergy of water and potting soil is essential. Initially, you should lavish attention on soil saturation, ensuring good contact between bulb and soil. Maintaining optimal soil conditions, nurturing yet not drowning the bulbs, will lead to a garden resplendent with vibrant blooms. A devoted gardener understands the importance of catering to the soil’s moisture level to best cultivate life from the rich earth.
The containerized bulbs should be kept in a cool and dark location with a stable temperature—as mentioned earlier—near 40°F. A garage or basement work well. Again, replicating the bulbs’ natural winter habitat is ideal for their development. But it’s crucial to avoid placing pots where they can be subjected to freezing temperatures, to prevent damaging your bulbs.
Transitioning the Containers Outside in Spring

In this phase, every move is careful and deliberate. It’s about gently nudging those sleeping bulbs to wake up and get ready to show their magnificent colors when the time comes.
A lot hinges on the local climate and the amount of sunlight the bulbs receive. As the frost warnings disappear and the days start getting warmer, it’s time to introduce them to the outdoors, little by little. It’s best to find them a cozy, sheltered spot initially before moving them to take center stage in their permanent location.
Finally, when it comes to maintenance, be sure to provide the bulbs with regular hydration, generous amounts of sunlight and a good all-natural fertilizer to make sure they dazzle when in bloom.
Conclusion
As we reach the destination of this voyage, you are now prepared to embark on your own adventure of nurturing spring-blooming bulbs in containers. As you visualize the vibrant tableau of colors and textures that await you, explore our selection of the best fall planting bulbs to employ along your journey!